First I determined how long I wanted it to be. Mine is 34 inches. Then I found some nice hard wood. I used reclaimed mahogany . Then I used another scrap piece of pine as my spacer and glued it to the back of the mahogany. This is the mast.
After that I figured out how many cross pieces I wanted. I decided on four. I had some scrap pieces of mahogany from framing. I used 11 inch pieces for my cross sections. I then found the center of them and measured out from there for the width of the easel frame.
I then positioned my pieces that will form the bracket that will allow the cross pieces to slide up and down the easel mast. I made sure to leave a little wiggle room here so it can slide easily. These also happened to be scrap framing stock that had the right depth rabbet to fit around the mast.
Once in place I drill to bolt each bracket to the cross piece. Then glue and bolt it together.
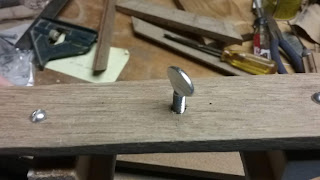
Next I drilled through the center of the cross piece for the thumb screw. On the back side I counter sunk for a nut to be pressed into place for the finger screw to tighten into.
Once you test it to make sure it fits and works properly the cross piece is finished. Just repeat this for the rest of the cross pieces. The cross pieces that are in the center should have a rabbet on top and bottom.
Once it is finished all that is left is to mount it! I mounted mine to the closet door in my mobile art studio with bolts through the top and bottom.
Then start using it!😉


